Showing posts with label recipe. Show all posts

Thursday, April 8, 2010

an easter rabbit.


Ok, so for the past few months I’ve tried to go vegan(ish), but I couldn’t resist the idea of cooking up a lavish dinner of Lapin a la Moutarde just in time for Easter.  (I joked with my sister that I cooked the Easter Bunny.)  The process took a few hours, mostly because you use the least meaty parts of the rabbit to make your own rabbit stock.  But the end result was insanely delicious – tender pieces of rabbit, served with a side of vegetables, and lovely glasses of Aligote!


Rabbit with mustard sauce (Lapin à la moutarde)

Ingredients:

1 farm-raised or wild rabbit, cut into serving pieces, including the head if possible
1/2 c. smooth Dijon mustard (moutarde forte)
1/2 c. old-fashioned grainy Dijon mustard (moutarde à l'ancienne)
Kosher or flaky sea salt and freshly ground pepper
1/2 c. dry white wine, such as Chablis
1 c. crème fraîche
2 T. snipped fresh chives

1 T. olive oil
1 onion, chopped
1 leek, sliced
1 medium carrot, coarsely chopped
2 leafy stalks celery, sliced
Bouquet garni of 6 parsley sprigs, 1 bay leaf, and 6 leafy thyme sprigs
6 peppercorns

Optional: A dozen or more freshly pulled white onions 1-2 inches in diameter, peeled but left whole, cooked with water to cover, 1 T. butter, and 1 1/2 t. sugar until the water is evaporated and the onions starting to caramelize.

 Make the stock: In a heavy dutch oven, heat the oil over medium heat, and brown the parts of the rabbit that have very little meat (the front of the rib cage) as well as the head if available. (Reserve the saddle, cut in 3 pieces, the thighs, and the forelegs for the dish.) When the rabbit pieces are browned on all sides, add the vegetables (except the bouquet garni), and brown lightly, stirring, for 5-10 minutes. Add the bouquet and water to cover. Bring to a boil and skim. Turn the heat to low and partially cover the pot. Simmer 3-4 hours. Strain, pressing down on the solids and discarding them. Return the stock to the dutch oven or medium saucepan if it is already somewhat reduced, place over medium heat, and reduce by 2/3. Pour into a small saucepan and continue reducing until 1/3 cup remains. Reserve.

Meanwhile, three hours before serving, combine the two mustards with a generous pinch of salt and grindings of black pepper. Smear the remaining rabbit pieces with the mustard, thoroughly covering them, and arranging them in a single layer in a gratin or baking dish. Set aside in a cool place for 2-3 hours.

50 minutes before serving, preheat the oven to 350 degrees F. Bake the rabbit, uncovered, for 15 minutes. Open the oven and pour the wine and the reserved reduced rabbit stock over the rabbit, then bake 20 minutes more. Remove the dish from the oven and drizzle the crème fraîche over the rabbit. Return to the oven for 5 minutes more. If using the onions, gently strew them over the dish. Sprinkle with the snipped chives.


Monday, December 14, 2009

RECIPE: Vegan Udon Sushi Rolls


One of my favorite things to eat are nori rolls.  These differ from “sushi”, as I don’t put sushi rice into them, but this version of a nori roll was something I modified after eating something similar this past weekend – it has the carb component (like regular sushi).  It’s a pretty simple and tasty lunch item.  You will need:

Nori sheets (you can use roasted for more flavor)
Avocado
Tomato
Chives or green garlic shoots 
Cooked organic udon noods (well drained)
Roasted sesame seeds
Umeboshi paste (optional)

Lettuce, spinach, or any other type of fresh greens

Take one sheet of nori and dab a thin line of umbeboshi paste (depending on how strong of a taste you want of the umeboshi) about an inch to two inches from one edge.  Arrange a handful of noodles on nori, and add sliced avocado, slice tomatoes, chives/garlic shoots, and sprinkle with sesame seeds.  Top with a handful of greens (I prefer spinach, which is rich in iron).  Roll the nori tightly to create a “sushi” roll, and either eat as is, or cut into slices.  It is absolutely delicious, and quite filling. 

Sunday, October 11, 2009

RECIPE: A Couple of Tapas Recipes


I told my friend I'd make him dinner - something that I like to do for any of my friends who love to eat - and racked my brain thinking of what to make for him. I've been on a pasta ban for a while, so I didn't want to do Italian, and French cooking seemed a little too formal, so I decided on Spanish tapas. Easy, simple, using mostly similar ingredients, I'd be able to make several dishes within minutes. Two of my "must haves" are Camarones al Mojo de Ajo and Pan Tumaca - both are incredibly easy and require little to no accuracy in measurement.


CAMARONES AL MOJO DE AJO

Half a pound of large white shrimp, peeled and deveined but with tails still attached
6-7 cloves of garlic, finely minced
salt and pepper
Pimenton de la Vera
Olive oil
Chopped fresh parsley

Heat oil in a skillet that holds heat well (heavy bottomed is preferable). Saute the garlic until it is lightly browned, then add the shrimp and saute until the shrimp is cooked through and the garlic has darkened. Be VERY careful not to burn the garlic. Season with salt and pepper, then toss with a dash of pimenton de la vera.

Garnish with a sprinkle of chopped fresh parsley.


PAN TUMACA

The preparation of pan tumaca is pretty similar to that of Italian bruschetta, but instead of using chopped tomatoes, I use a puree. When using olive oil as a dressing (not heating it up), use the best tasting olive oil you can afford.


Plain baguette
One whole clove of fresh garlic, peeled
Extra virgin olive oil
Jamon serrano
Large, ripe heirloom tomato (I like the reddest, ripest ones you can find!)
Salt and pepper
Chopped fresh parsley

Using a food processor, puree the tomato and season with salt and pepper. Let the puree sit for a few minutes to rest. Slice the baguette and toast them in the oven. While the slices are still warm, rub them with the fresh garlic. You can use as much or as little as you prefer - be warned that fresh garlic is quite potent, so you may want to keep that in mind! Arrange the slices on a plate and top each one with a generous spoonfull of tomato puree. Top with a small piece of jamon serrano. Drizzle olive oil across all the bread slices, and garnish with parsley.

Easy right? I told you so. Buen provecho!

Thursday, June 18, 2009

RECIPE: Pork Tenderloin with Herbs de Provence


Before I started cooking regularly, I always wondered how my mom cooked without measuring anything. As a child, when I started learning how to cook by recipe, I was very precise at measuring and timing. But as time went on, I found myself using cookbooks more for inspiration than anything else, and becoming one of those people who adds a dash of this and a sprinkle of that. Tonight's dinner was pretty impromptu - I stumbled into Bryan's (an amazing butcher shop in SF's Laurel Village) and pondered over what meat to get. Chicken? Duck? Rabbit? Beef? I settled on a nice piece of pork tenderloin - about a pound - and went to work to make dinner for my friend Candice and I.

Ingredients:

Pork tenderloin (about 1 lb. for two people)
Two garlic cloves
Herbs de Provence
Sea Salt
Black Pepper (preferably freshly ground)
Olive Oil
Summer Squash, sliced
Onion, sliced very thinly
White wine


Chop up garlic and mix with a healthy amount (a tablespoon or maybe more?) of Herbs de Provence, fresh ground pepper, and sea salt. This is your rub for the pork. Heat an oven-proof pan, add some olive oil, and brown the outside of the seasoned pork tenderloin on both sides (just about a minute on each side). Then put the entire pan in the oven (set to 350 degrees), covered with foil. Take the squash, toss in herbs, salt, pepper, and olive oil, and then add to pan. Cook the pork for about 15 minutes, then remove the foil. Put the oven on broil and let cook for another ten minutes. Total cooking time should be about 30 minutes per pound, maybe slightly less depending on the thickness. (Don't overcook it!)

Take the pork out of the pan to rest, then put the squash aside. Add a little bit of wine into the pan to deglaze it, add salt and pepper, and a bit of butter. Add onions and reduce. Keep adding wine and reducing until the onions are softened and somewhat pickled.

Slice the pork thinly, and serve with squash. For color, I like to also serve it with a green leafy vegetable, like kale or chard. Top with onions and some of the sauce. Voila!

Wednesday, June 17, 2009

RECIPE: Duck Breast with Figs in Balsamic Reduction


Taking a cue from one of my friends who loves to cook, yet doesn't like measuring anything (or giving specific ingredients for that matter), I decided to try my hand at cooking duck breast. Granted, the best possible way to cook duck breast (or any meat, really) is by using the sous vide method, but I don't have the time, patience, or equipment for all that!


You will need:

duck breasts (fresh, with skin on)
balsamic vinegar
red wine (optional)
honey
fruit - I used figs (washed and quartered), but you can use fresh ripe peaches or pitted red cherries
salt
pepper


Season the duck with salt and pepper. Put a tiny bit of oil in a saute pan and sear the duck breasts, skin side down. Depending on the thickness, you can cook the duck 5-10 minutes on each side. Make sure to get the skin extra crispy, but don't overcook. Put the breast on a plate to rest, and reserve the juices in the pan.

Add a generous splash of balsamic vinegar to deglaze the pan, then season with salt and pepper and a dollop of honey. Add figs and the optional splash of red wine and reduce until the figs are soft and sort of falling apart. Taste the reduction to make sure it's not too sour - adjust with honey and salt as necessary.

Slice duck breast thinly and serve with the reduction, accompanied by a potato puree and some vegetables (I prefer brussels sprouts or something else green, just for color on my plate). It is DIVINE.

Bon apetit!

Wednesday, September 19, 2007

RECIPE: Southern Style Buttermilk Fried Chicken


I have a fear of frying.

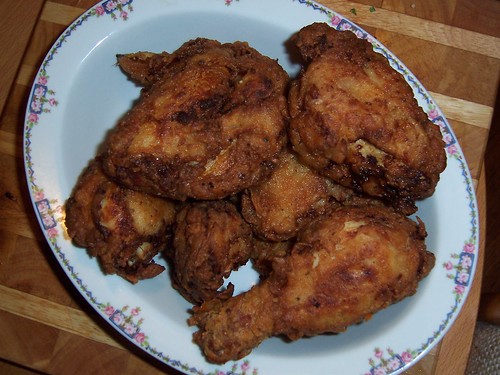
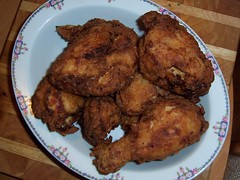
You would think that I'm used to it, growing up in a Filipino household that fries EVERYTHING (lumpia, pork, ukoy, fish), but truth be told, I was scared of the flying grease that would jump out of the deep fry pot and inevitably land somewhere on my bare flesh when I hung out in the kitchen with my mom. I've come a long way in overcoming my fry-phobia, but making fried chicken is something that I've never attempted...until this evening. It actually turned out really well - my taste testers approved!

Buttermilk Fried Chicken

1/4 cup salt
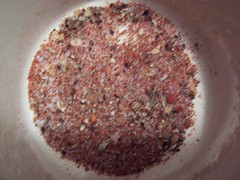
1/4 cup + 2 tablespoons of seasoning: your own preferred mix of garlic salt, black pepper, paprika, cayenne pepper,dried thyme, dried oregano (I like a lot of cayenne)
2 tablespoons granulated sugar
1 quart buttermilk
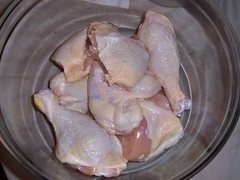
1 whole chicken, cut into 8 pieces
2 cups flour
Peanut or canola oil, for frying

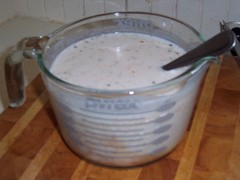
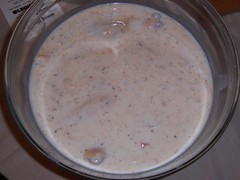
Combine the salt, 1/4 cup of seasoning and sugar in a large plastic container or non-reactive stockpot. Add the buttermilk and stir to completely dissolve the salt and sugar. Immerse the chicken, cover, and refrigerate for at least 4 hours and up to 24 hours.


Combine the flour and remaining 2 tablespoons seasoning in a large resealable plastic (i.e. Ziploc) bag; shake to combine.

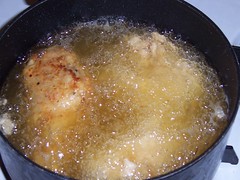
Heat 4 inches of oil to 375 degrees F in a large cast iron skillet or Dutch oven.

Remove the chicken from the buttermilk and shake to remove excess. Add the chicken in batches to the flour and shake to completely coat. Remove and shake to remove excess flour. Place on a wire rack set over a baking sheet to rest until ready to fry.

Fry the chicken in batches, skin-side down, until golden brown and cooked through, about 8 minutes. Turn and fry until golden brown on the second side, about 8 minutes longer. Remove and drain on paper towels.


(Note: An even oil temperature is key to the success of this recipe; a clip-on candy/deep-fry thermometer should be kept in the pot at all times. And the temperature should register at least 325 degrees F during the cooking process.)

Serve hot or at room temperature.

Wednesday, September 5, 2007

BOOK: The French Chef Cookbook by Julia Child


I inherited a well-worn copy of this book many years ago from an ex-boyfriend (the same ex who got a copy of The French Laundry Cookbook for Christmas, and never attempted to cook from it during the entire time we were together). Published in 1968, this book was the result of the TV program "The French Chef", intended to teach as much French cooking technique as could be learned in several seasons of weekly half-hour programs.

Julia Child covers so many French classics: Coq au vin, Quiches, Crepes, Boeuf Bourguignon, Pates, Aspics, Cassoulet, Duck a L'orange, Brioches, Souffle....and goes on to describe techniques such as how to debone a leg of lamb, how to roast a suckling pig, basic sauces (Hollandaise, Bearnaise), blanching bacon, wine storing, chocolate melting, and so much more. I always go back through this book when I need a reference on how to do something. I am hardly a master at French cooking, but with Julia's helpful hints, I feel much less like une imbecile in the kitchen. This is definitely a "must-have" for any aspiring cook.

Tuesday, August 28, 2007

BOOKS: I Am Almost Always Hungry by Lora Zarubin


I picked this book up on sale at a local book shop here in Pacific Heights after seeing it in a few of the fancy boutiques on Fillmore and Polk Streets. It did not disappoint!

This beautifully photographed cookbook is composed of innovative seasonal recipes. Although some of the recipes are definitely not for beginners, there is a certain simplicity to her cooking that preserves the flavors and essence of the season she is cooking for. Each chapter is actually a menu of three to four courses, and she makes everything from soup to grilled lobster to risotto, to panna cotta. She also gives a little commentary on why she chose the particular menu to write about.

My lucky (or unlucky?) friends will be the "guinea pigs" that I will test more of these recipes on. If you are fortunate enough to have a good farmers market nearby (like the one at the San Francisco Ferry Plaza), you will be inspired to start cooking seasonally after you peruse Lora Zarubin's book, and rightfully so!

RECIPE: A Page From "Entre Nous": Gigot d'Agneau

I am not a trained professional. Everything I learned about cooking I learned from my mom, my ex, and TV. Certain things still scare me, like trying to make a souffle, making Hollandaise sauce from scratch, and cooking large pieces of meat in the oven (I just don't trust myself sometimes). However, there is one dish that I can say that I am able to do well. Gigot d'Agneau - sounds fancy, doesn't it? I don't have photos of this one, but trust me, it is quite good, and easy to boot.

Gigot d'Agneau

5 lb. leg of lamb, deboned
6 whole garlic cloves
5 T extra virgin olive oil
herbs & spices (I use Herbes de Provence)
12 small potatoes
8 whole garlic cloves

Preheat the oven to 400 degrees. Use half the olive oil to coat the lamb, and rub it with garlic. Sprinkly generously with herbs, salt, and freshly ground pepper. Roast the lamb in oven one hour. Drizzle potatoes with remaining olive oil, season generously with herbs, salt, and pepper, and place potatoes and garlic around the lamb. Cook an additional 35-40 minutes, or until lamb is medium rare. Transfer lamp to a serving platter when done. Continue roasting potatoes until browned. Place potatoes and garlic together with the lamb on the platter.

I serve this with haricots verte and braised fennel topped with fresh Gruyere. Be careful not to overcook the lamb (very easy to do). I convinced one of my friends who swore she didn't like lamb to try it, and she totally liked it. Voila! Crowd pleaser!

Monday, August 27, 2007

RECIPE: Taste of Valencia: Paella


I was perusing a magazine one day at work, when an article caught my eye: it was a two page spread on the culinary delights of Spain, with a giant photograph of a beautiful pan of Paella Valenciana. The simple metal pan was overflowing with seafood, chorizo, and chicken atop a bed of saffron and tomato infused rice. The mere sight inspired me to buy a paella pan from Sur La Table ($19.99) and try my hand at making it. I found out that it's actually pretty simple, and when the dish is finished, it is rather impressive. I am not one to follow a recipe to the letter, rather, I take the general idea and run with it. You will need a paella pan. So here is the basic framework for Paella Valenciana - I don't know the proportions exactly, you just have to feel it out. If you have ever made risotto before, the process is very similar. This recipe can be expanded to feed many...if you find that the liquid amount seems too little, make sure to have extra chicken broth on hand to cook the rice all the way through.

Paella Valenciana

Per person, you will need:
1/2 c. Paella rice (I use Valenciano brand)
1/4 c. Dry white wine
5 Saffron threads
1/2 c. Chicken broth
1 Tomatoe, pureed
1/4 Onion, diced
1-2 cloves Garlic, minced
1/2 a Chicken breast, cut into strips
1 piece Dried chorizo (not the mushy fresh kind), sliced at an angle
2-3 Mussels
2-3 Clams
3-4 Shrimp, deveined, with shells still on
Frozen peas
Artichoke hearts
Red bell pepper
1/2 tsp. Pimenton de la Vera
Olive oil

Toast the saffron threads in a dry sauce pan until they start to release aroma. Add white wine to the pan and bring to a boil, then keep on low heat so the liquid stays warm. Heat the paella pan on medium high heat, and coat generously with olive oil. Saute the onions and garlic, then add the chicken breast. Cook until the chicken is lightly browned. Add the chorizo and heat through. Then, add the rice and keep stirring until the rice is coated with oil. Add the tomatoes and a heaping spoonful of pimenton de la vera and mix until even. Ladle some of the wine mixture and add a little chicken broth. This begins the cooking process for the rice. You will slowly add liquid and keep at a low simmer until the rice is almost done. Add all of the vegetables - the peas, artichoke hearts, bell pepper, and make sure the rice does not stick to the bottom of the pan. Add the seafood and cook until the shrimp is done and the shellfish have opened.

Serve this dish with red wine or a nice glass of sangria, and it makes an incredibly tasty, filling, and beautiful meal.